Pages

Showing posts with label coffee table. Show all posts

Monday, 28 July 2014

Yellow chalk paint coffee table

This project was a bit daunting as the item was already in good condition before I decided to paint it. I never have any second thoughts about painting something that is in poor condition but there is a moment of hesitation about painting something that looks fine just the way it is. But I decided to paint this coffee table anyway.
This is the before photo.
Here is what I used
- Canterbury Blue Chalk EZ2 Paint
 - Canterbury Blue Wax
- Paint brush
- Sanding pads
- cloths


What I did
- I gave the coffee table a wipe down to clean it
- Put a coat of chalk paint on, then waited for it to dry
- Put on a second coat of paint, allow to dry
- Placed a thin layer of wax over the paint and then buffed it off  (you can skip this step)
- Sanded the coffee table. I roughed up the corners and edges a little to give it a bit of character. Even if you dont want to distress the piece a light sanding changes the paint feel from a rough chalky feel to a silky smooth finish.
- Wipe off the excess sanding dust.
- Apply the wax again and then buff off.

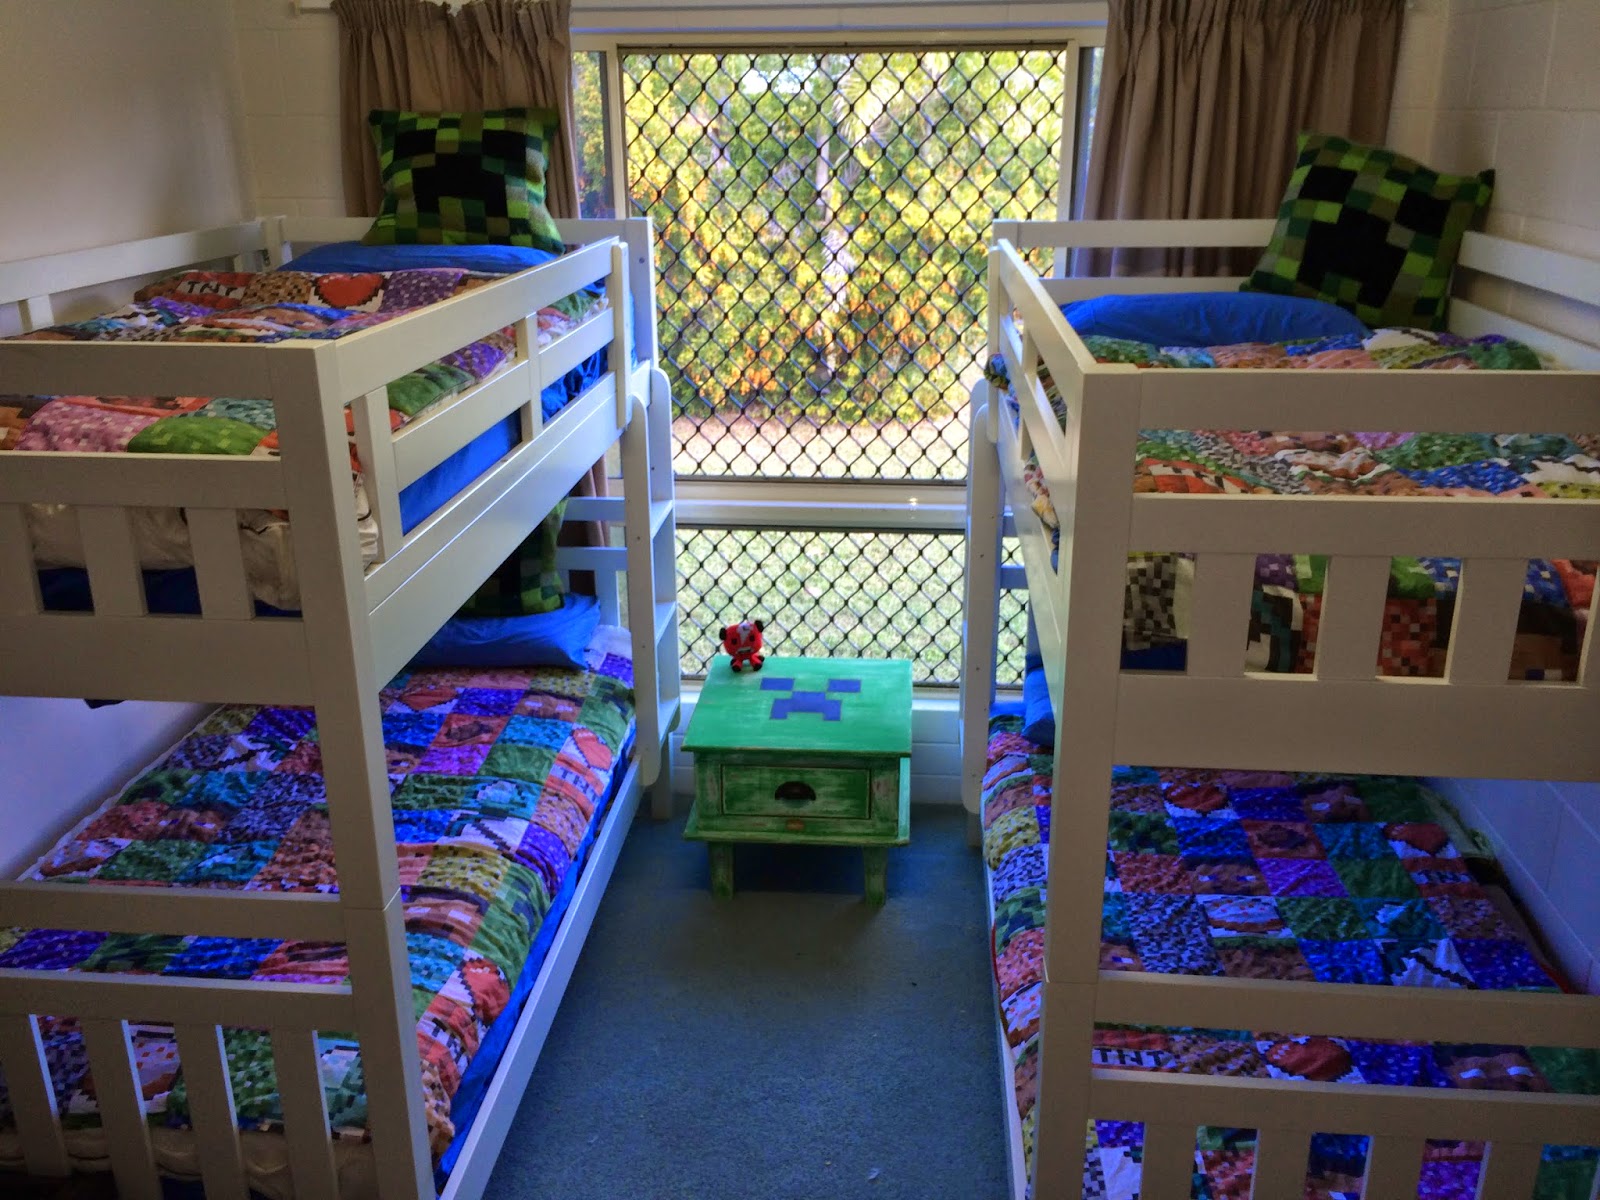
And now my pretty 'new' coffee table.


 I am happy I took the plunge and painted it. It is a very long coffee table and is nearly as long as the lounge it sits in front of. It is in a small room and the dark timber look really dominated the room. But now it has a softer feel about it, almost a Country Farmhouse type feel.

The Pottles of paint are $25 and I used about half a pottle for this project. The wax is $15 and I used about 1/4 of a tin, maybe less. I already had rags, a paint brush and sanding paper. So even if I count in the sanding sheets I used then this project cost me about $20. Not bad for a completely different look for the room. 

Sunday, 13 July 2014

Minecraft coffee table

My boys want a Minecraft themed bedroom. The company that makes Minecraft hasn't expanded into the complete range of merchandise to flog to kids. Though I am sure it is just a matter of time but for now I can't just go to the store and buy Minecraft decor items. So I am slowly decorating the hard way, which is DIY.
So far the boys have knitted wool cushions which Grandma made from a pattern found here.
I also bought them weighted blankets made with Minecraft fabric. Weighted blankets can help calm and settle children with sensory issues especially children with autism.


I had this old coffee table that was doubling as a bedside table between the bunk beds. It was very knocked about and even had a corner chewed by a dog many years ago.

 I sanded the coffee table and put two coats of undercoat on. I then put two coats of leftover green paint on. I then tried my best to make a Creeper face template. I was convinced it was big enough but I think I should have made it bigger still. I was also convinced I had centered the template before painting. hahahaha. Luckily the boys haven't noticed.
I then had a wild urge to distress the paint. I have never tried heavily distressing a piece of furniture before but wanted to try before I start a BIG project later in the week.
Here is the final product. I haven't sealed it yet as I am trying to work out if I need to make any further adjustments first.


Here is a photo from when I was falling off what I was standing on to try take these photos. Luckily I wasn't injured. :)

I have seen a few removable wall stickers on Etsy that have Minecraft related designs. I am thinking of getting some of those for the room. I also plan to get the boys to help make some paintings to hang up in here. I think we have enough Creepers in here though. I really want to make a Minecraft pig as they look cute.

I hope you have a great day. I am hoping to stalk the postie today as I am waiting on exciting things to arrive for a new project. :)

Tuesday, 28 August 2012

Chalk Board Coffee Table

I bought this coffee table very cheap at an auction. Initially I wasn't sure what I was going to do with it. I had thought maybe using it as a base for an ottoman but then I decided to turn it into a chalk board coffee table.
The base was a bland grey colour so I spray painted it blue. I then sanded back the top and painted it with chalk board paint. Now it didn't quite go to plan as the paint kept going very streaky. I tried using a mini roller but still got lines. I sanded back between coats but it still looked streaky. I then sanded it back again and tried using chalk board spray paint. Well it wasn't streaky but I am not sure if I am any happier with the results.

As it is for the kids I figured that they wont mind if it wasn't 100% and once there is a layer of smeared in chalk no one will ever notice.
The Littlest Man really likes this as he can easily reach. Usually with upright chalk boards he can only reach the bottom third. Now he can cover the entire area in squiggles.