Pages

Showing posts with label table. Show all posts

Monday, 28 July 2014

Yellow chalk paint coffee table

This project was a bit daunting as the item was already in good condition before I decided to paint it. I never have any second thoughts about painting something that is in poor condition but there is a moment of hesitation about painting something that looks fine just the way it is. But I decided to paint this coffee table anyway.
This is the before photo.
Here is what I used
- Canterbury Blue Chalk EZ2 Paint
 - Canterbury Blue Wax
- Paint brush
- Sanding pads
- cloths


What I did
- I gave the coffee table a wipe down to clean it
- Put a coat of chalk paint on, then waited for it to dry
- Put on a second coat of paint, allow to dry
- Placed a thin layer of wax over the paint and then buffed it off  (you can skip this step)
- Sanded the coffee table. I roughed up the corners and edges a little to give it a bit of character. Even if you dont want to distress the piece a light sanding changes the paint feel from a rough chalky feel to a silky smooth finish.
- Wipe off the excess sanding dust.
- Apply the wax again and then buff off.

And now my pretty 'new' coffee table.


 I am happy I took the plunge and painted it. It is a very long coffee table and is nearly as long as the lounge it sits in front of. It is in a small room and the dark timber look really dominated the room. But now it has a softer feel about it, almost a Country Farmhouse type feel.

The Pottles of paint are $25 and I used about half a pottle for this project. The wax is $15 and I used about 1/4 of a tin, maybe less. I already had rags, a paint brush and sanding paper. So even if I count in the sanding sheets I used then this project cost me about $20. Not bad for a completely different look for the room. 

Sunday, 27 July 2014

Bedside table upcycle aka Teal delight

I am on a roll with the chalk paint and my technique is improving to where I am really happy with the quality of my work. I am so happy with how these turned out and can't wait to share pictures.

I had these old bedside tables that really looked cheap and weren't doing the room any favours.

Here is what I used
- Canterbury Blue Chalk paint in Teal
- Canterbury Blue Wax
- Paint brush
- Sanding pads
- cloths
What I did
- I gave the cabinets a wipe down to clean them
- Put a coat of chalk paint on, then waited for it to dry
- Put on a second coat of paint, allow to dry
- Placed a thin layer of wax over the paint and then buffed it off  (you can skip this step but I wanted to try it for this project)
- Sanded the cabinets. Even if you dont want to distress the piece a light sanding changes the paint feel from a rough chalky feel to a silky smooth finish.
- Wipe off the excess sanding dust.
- Apply the wax again and then buff off.

I did one at a time as I wasn't sure if this was the perfect colour but luckily it was. Check out the after photos.


They look awesome and it only took a small outlay in time. But I am now thinking that the bed frame needs some work. I better add that to the 'To Do' List.

Check out the awesome knitted blanket my Mum made me for my birthday. :)

Thursday, 10 July 2014

Upcycle - Table runner

I know I only recently featured an upcycled tablecloth but last night I had a wild urge to make myself something pretty and I couldn't wait to share it. Besides snuggling up in a comfy chair with a project seemed to be the best cure for last night's cold weather.

I started with a plain store bought runner and a table full of supplies.
 The crochet flowers I bought in bulk off ebay ages ago. I also used buttons and coloured threads.
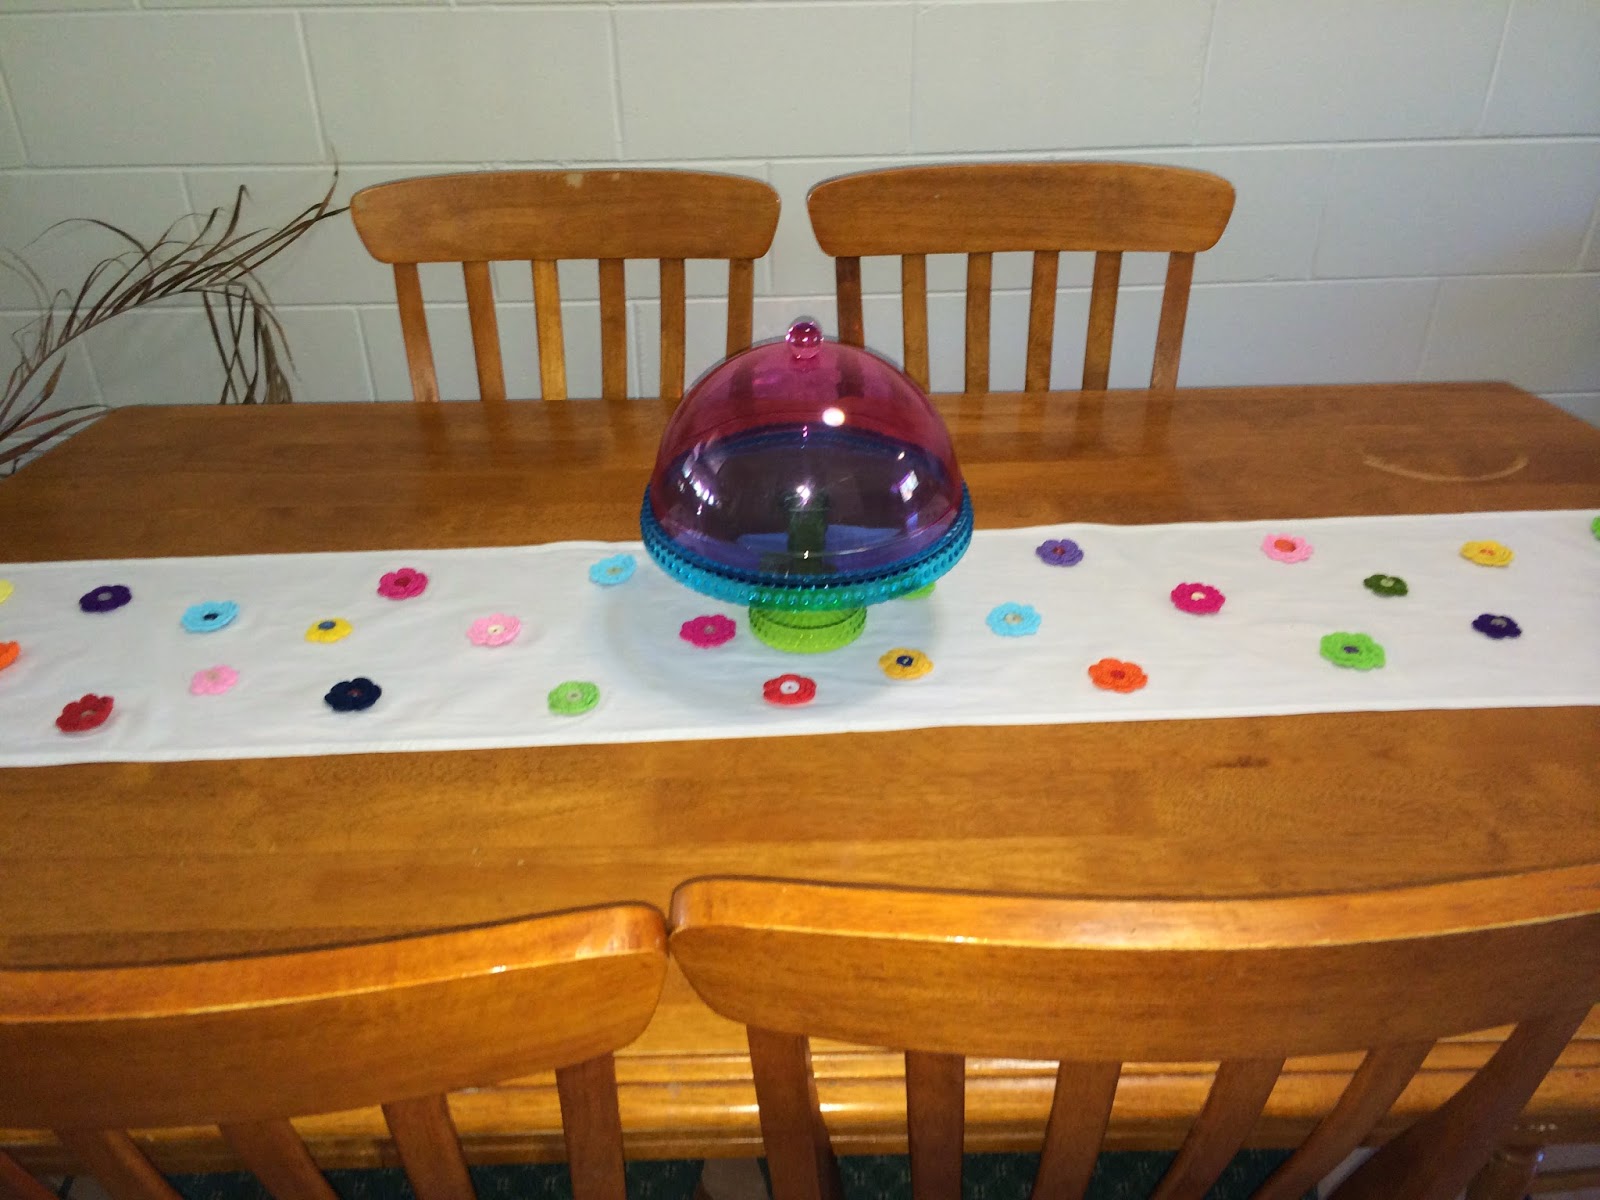
 Now here is the finished product on the table.
I have yellow pompoms at one end and red on the other end because I was using up scraps.

I am really happy with how it looks. It will be great for birthday parties or just when I need a dose of happy. 

Next week I am hoping to have a few big furniture projects to share. I am so excited to get started on those. I am just waiting for supplies to arrive. Now to head to the shed and finish something special for the boys. 

Monday, 17 September 2012

Blue Table

I bought this table very cheap, it had been knocked about a bit, from a furniture store. It then took me a couple of years to notice that one leg was very different to the others. I was using the table as a craft table so it really didn't matter.  It was sturdy and strong and that's all that matters. But I got sick of the boring brown and it was time this table got a makeover too.


I gave the table a light sand and then painted it in an exterior paint that has an undercoat built in. I am not sure if I am going to distress the table and if I do then I don't want an undercoat showing. The colour I picked is a Dulux exterior paint colour called Template.
This table is very heavy and very difficult for me to move by myself so unfortunately the "after" photos aren't very flash.

I really like the colour but haven't decided if I leave it as it is or if I distress it. Either way I still need to do a very light sand on the top to remove some of the paint brush lines.
I do like the colour and can just imagine how nice it would look set up with an afternoon tea spread of nice china, scones and cream, and a jug of iced tea.

Tuesday, 3 July 2012

Mum's Patio Renovation Part 2


My Mum is on a roll with her Nautical themed patio make over. She has just performed her magic on a couple of chairs and an old table. I have seen better furniture thrown away at the rubbish dump but Mum was determined to bring new live to the items and save them from becoming landfill. Let us start with the ugly old chairs.


Mum removed the chair pads and recovered them in a nice clean fabric.
Next out came the paint brushes and suddenly they look worthy to sit on.
With the chairs finished it was time to tackle a very old metal table.

Mum sanded back the frame and got busy with her paint brushes again.
 TA DA!!!!!!  Now for a different angle.

Sunday, 10 June 2012

Froggy Fun

I liked this little side table but it wasn't in the best shape. I bought it second hand and it has had bad repair work in the past. At some point it had a draw but now there is a wooden panel attached in the hole. There are large gaps around the board and it looked very poor. 


It took a while to sand back the varnish, add filler to the gaps and do the undercoat. Then it was time to do the top coats of paint. I was so excited to use this tint. It is called Leap Frog and I think it is such a happy colour. I was out by the shed painting away with a silly smile on my face.


Luckily I really like the colour because I still have a lot of paint left in the tin. Being a scrooge, I'm not letting it go to waste so be prepared to see it pop up again in the coming weeks. My dully lit lounge room doesn't do justice to how vibrant the colour is. It is nice to have a splash of colour in there and hopefully soon there will be other funky pieces around the house.


Saturday, 9 June 2012

My $10 outdoor table

This table I bought for a bargain price of just $10. Obviously nobody wanted a dirty moldy outdoor table. My Mum described it as "hideous" which was a little unfair as it just needed some TLC. It was very sturdy and I didn't have to reinforce it or fix anything.


I sanded it back which improved its appearance 100%. I then used a primer in a spray can which was incredibly quick and easy. I then spray painted 2 coats of pink. It was the first time I have ever painted furniture with a can of spray paint. I actually like the result. It is actually a vibrant pink but my camera settings give a very disappointing photo of the results. Hopefully I can sort out the camera settings to take photos of the table with new chairs. 

It is a very pretty addition to the pool area. I can't wait to add a few chairs and sit out there with a refreshing drink when I am watching the children swim.

Update - I'm going to class this as a project fail. The paint has faded very quickly. So scrap any plans on using spray paint outdoors. I will be re-doing this with a tin of outdoor paint now.